High City
Modular Sci-fi City
High City (Unreal 5)
Processing video...
Contents:
1. Overview
2. Setup
3. Traffic Usage
4. Traffic Setup
5. Vehicle Setup
6. Add Custom Vehicle
7. Neon Flash (Advertisment)
8. Video Advertisment (mp4 files and content)
9. Idle object waver
1. Overview
High City is a modular, high detailed sci-fi city constructor. Includes:
- Walls, columns, stairs, roads, props etc.;
- Sci-fi fly cars pack + purpose cars: Police Dept., Fire Dept., Ambulance (12 items total);
- Background traffic system, blueprint based (see video preview);
- Idle object waver, blueprint based (see video preview);
- Video advertisement, material-blueprint based (see video preview);
- Neon flashing (see video preview);
- Street Food with props;
- Other props (hydrant, cables, conditioners, pipes, traffic lights etc.).
- Triangles Count: 10 - 5000;
- Texture Resolutions - 4K;
- LODs - Yes.
2. Setup
This is a Asset Pack type:
- Click download package: https://www.unrealengine.com/marketplace/en-US/product/de868070beb144e3aa59b48c3fb280da
- Import to any project (UE4 4.26 or higher is required);
- Note: package demoscene - desktop based;
- Open demonstration scene named: HighCityScene here: /Content/HighCity/HighCityScene.umap via editor;
- Hit Play.
3. Traffic Usage
This package includes background traffic system.
Background traffic system allows you to create city life simulation (background moving vehicles):
- There is blueprint named: BP_HCTrafficSpawner here: \Content\HighCity\Script\Traffic
- Drag and drop it to scene;
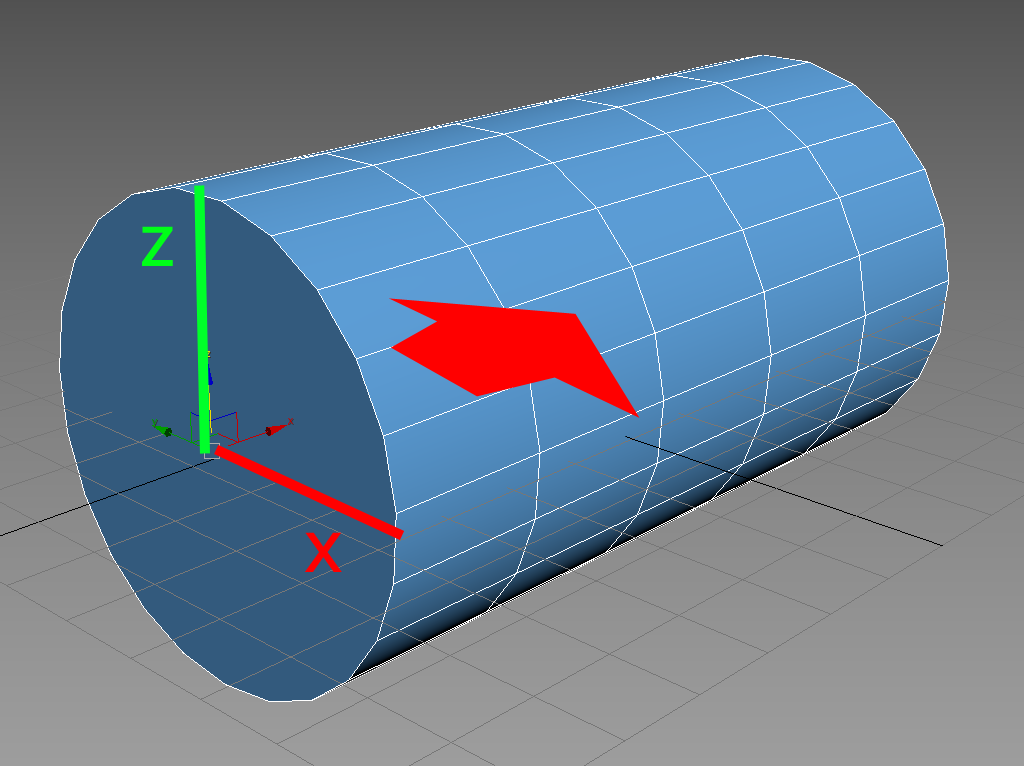
- Now you can see service actor with big Red Arrow;
- Adjust red arrow direction, position - vehicle line flow direction, spawn position;
- Hit play for preview.
4. Traffic Setup
Drag and drop BP_HCTrafficSpawner actor (see chapter 3) to your scene:
- Select BP_HCTrafficSpawner in the World Outliner;
- Now you can see HCTrafficSpawnerParams in the Details window:
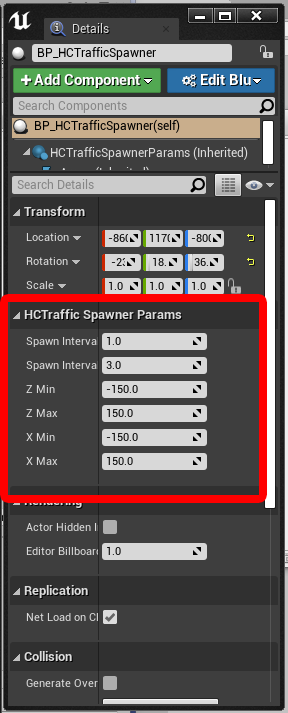
- Use Spawn Interval Min - Max values to adjust spawn time for new one vehicle (in seconds);
- Use Z Min - Max and X Min - Max values to adjust start position scatter for current vehicle (calculates randomly for each vehicle, ue4 units):
5. Vehicle Setup
Each package vehicle (stored in \Content\HighCity\Script\Traffic\Vehicles) contains script attached on it:
- Double click on vehicle in Content Browser;
- Here you can see HCVehicleParams in Details window:
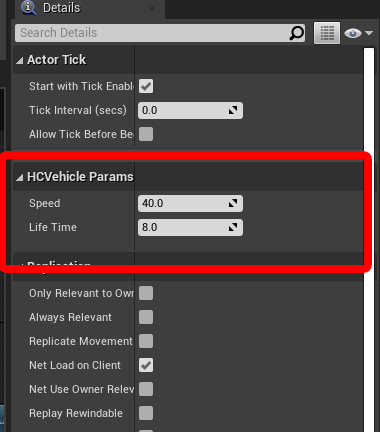
- Use Speed value to adjust speed movement for current vehicle (ue4 units);
- Use Life Time value to adjust life time for current vehicle, in seconds (spawned instance would be erased from scene at the life time period end).
6. Add Custom Vehicle
Add your own vehicle model (mesh) to traffic system (fast way):
- Click Ctrl+W (duplicate) on any vehicle stored here: \Content\HighCity\Script\Traffic\Vehicles
- Double click on duplicate, open Viewport tab;
- Select existing model (car), click Del (delete);
- Drag and drop your own model directly into viewport;
- Click Complie and Save, rename your actor;
- Double click on BP_HCTrafficSpawner here: \Content\HighCity\Script\Traffic :
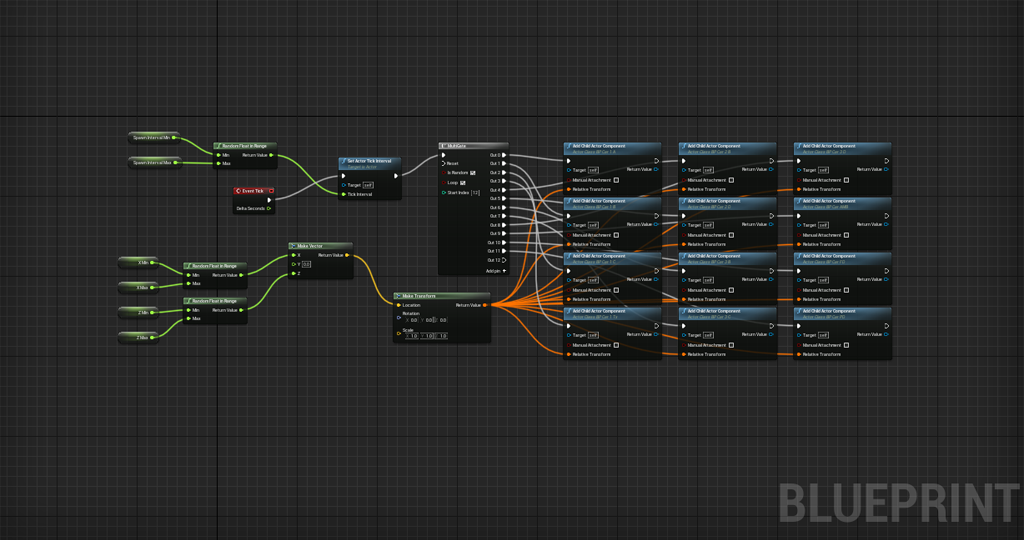
- Now you can see event graph for traffic (Event Graph tab);
- Drag and drop here your own scripted mesh (see above);
- Assign connections to new model: Relative Transform and Execute (just see other connections);
- Add MultiGate pin for your new mesh (keep last pin disconneccted);
- Done. Drag and drop your new Traffic to scene, hit play.
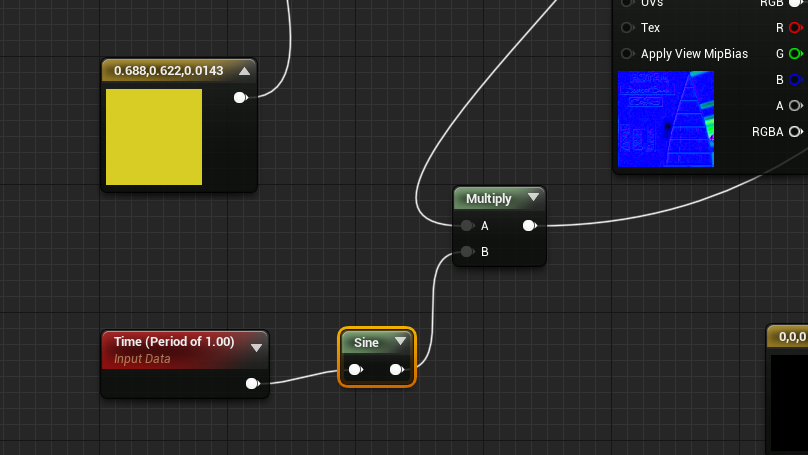
7. Neon Flash (Advertisment)
Adjust flash frequency and emission color:
- Select any M_advertis material or make duplicate, double click on it;
- Click on Sine node and adjust period for frequency;
- Click Constant3Vector and adjust emission colour:
8. Video Advertisment (mp4 files and content)
Commercial usage is allowed, without music. Video sequences only.
9. Idle object waver
There is blueprint script which allows you to make waving for idle object:
- Service actor stored in: \Content\HighCity\Script named BP_HCWave
- Drag and drop it to scene;
- Drag and drop to scene any model (don't forget switch mobility to movable for it (see transform in Details));
- Make your model as child for BP_HCWave in your scene via World Outliner;
- Adjust params for waving if necessary:
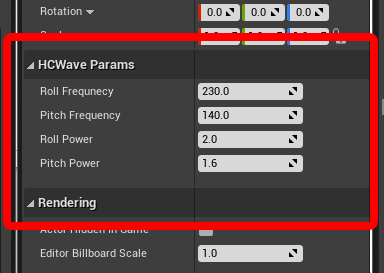
- Hit play...